Making mosaics out of smaller photos
2014-05-08 00:00:00This post is part of a series of tutorials about using open source software for permaculture design. Here are the links to the rest of the series: Getting the software, getting an aerial photo, making a contour map, google earth contours. DIY Contour Map
After a brief (or maybe not so brief) excursion to the outdoors with our last tutorial, it's time now to dig back into the computer stuff a bit more. Today's topic is how to create a mosaic out of a bunch of smaller images. One of the frustrating things about getting aerial photo imagery to use as a background for drawing your designs is that it often won't all fit on screen at one time. That means you can't capture the detail available in a single screenshot, so you end up settling for lower resolution if you want to get the whole site on the same map.
This tutorial will explain how to get the max resolution imagery onto your backdrop by taking multiple overlapping screenshots and sticking them all together in a single larger image.
Programs to automate this
There are a few programs out there that will stitch together images for you somewhat automatically. I think for most sites, the manual method is actually faster - however your experience may be different so I'll include a brief bit about the tool I'm most familiar with - an open source program called hugin.
Hugin has a somewhat intimidating user interface, with lots of options for all kinds of different situations where you've taken pictures with a camera and want to stitch them all together into a big panorama. It's actually a fantastic tool for that, and I highly recommend playing around with it if you like big panoramic photos. In our case, however, we're using it for a different purpose that isn't a perfect match for it's capabilities. The big difference is that we have a bunch of flat images, more like the result of scanning the surface of the earth rather than standing in one spot with a camera and shooting photos. This matters because in order to get a flat-looking mosaic out of a bunch of photos taken from one spot, you have to do some complex math to transform the image quite a bit (by default it would only look right if projected on the inside of a concave surface).
Most of the trick of using hugin for stitching flat stuff together is in configuring its math core to preserve the shape of the parts you're stitching together. Here's a pretty good tutorial for flat stitching with hugin. If you're interested in this approach, I'd give that a try and see what you think. The remainder of this tutorial will focus on the manual method I use with inkscape.
Stitching shots with inkscape
This is actually a very simple process. Basically, all we have to do is import all of your shots (cropped to eliminate stuff you don't want to have on your map), then drag them around until they line up nicely and finally export a new image. There are just a couple of tricks that might help, so I'll go over them here:
- Start by taking a bunch of screen captures of your site. It's very important
to make sure that all of your images overlap with their immediate neighbors.
This will allow you to line them up correctly later in the process. If you
follow these instructions, you should get decent overlaps on all edges.
However, if you think your overlaps aren't going to be big enough, feel free
to make them bigger (it won't add much extra work).
- Start at the top left corner of your site, and zoom the map all the way to the max.
- Save a screenshot, and name it with the row and column it'll be in for the final picture. This first one will be 01-01.png, and the one in the second row, third position will be 02-03.png.
- To move to the right, move your pointer to the right side of the map window so that it's still well inside the part of the image you want to keep (i.e. stay inside of anything you would want to crop out of your map).
- Grab the map near the top edge of the map window, and drag to the left until the hand is on the other side but still inside the crop region. Keep the hand at the same distance from the top of the window so that your alignment stays good.
- To move down, follow a similar process but go from bottom to top, and use the right or left edge of the window to keep yourself going straight.
- Repeat this process until you have your whole site captured in screenshots.
This image illustrates how they all overlap each other by a small amount.
-
Crop all of your screenshots in the gimp to make the file sizes smaller. The aerial photography post has instructions on how to crop using gimp, if you need a refresher.
-
Import your images into inkscape
- Click File -> import or press ctrl+i and select an image, then press import. Tell it to embed the image when you're asked.
- Move the image to approximately where it should go based on the file name you gave it. It's not important to get them in exactly the right spots at this point, just get them close. You can totally ignore the "document rectangle" that inkscape puts in, it won't show up in the result.
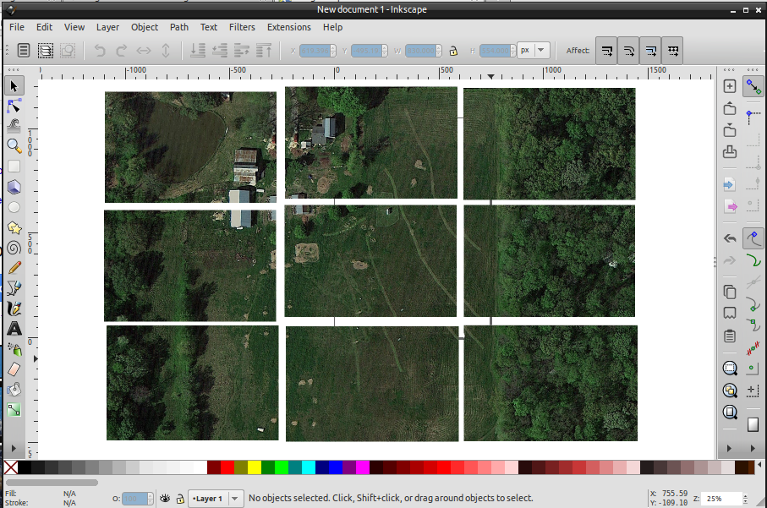
- Repeat the above steps for all of the screenshots. After this, you
should have something like this in inkscape (if you look closely you can
see the black lines between pictures that represent the document
boundaries, and you can see how I ignored them):
- Our next step is to arrange the screenshots so that they match up as well as
possible. The trick we'll use is to make the image we're moving transparent
so that we can see when its features line up exactly with the ones under it.
When it's in the right place, we'll drop it and remove the transparent effect.
- Pick the second image with the select tool (F1 or
 ).
). - Open the Fill and Stroke dialog by pressing ctrl + shift + F
- At the bottom of the window, move the Opacity slider to the left until you can see through the image. You can play with this setting to get it just like you like it so that it's easy to line things up.
- Drag the second image over the first until the overlapping features fit as well as you can manage.
- Move the Opacity slider back to 100%.
- Repeat these steps for every other image in the collection, moving them all into place so that their features line up and then dropping them there.
- Pick the second image with the select tool (F1 or
- Finally, you can select all of the images (ctrl + a) and export them as a single image (ctrl + shift + E). You can set the resolution of the image to be whatever you want, or let inkscape calculate it for you based on the actual size. In this case I recommend letting inkscape do it for you so you get the best looking result.
In Pictures:
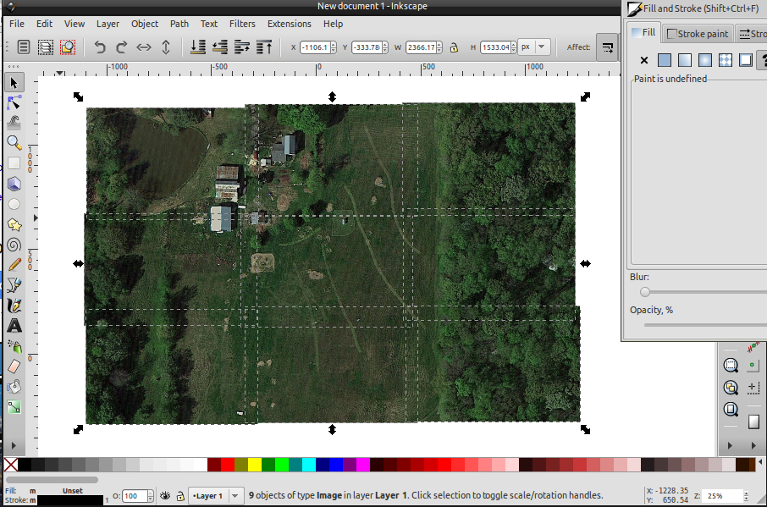
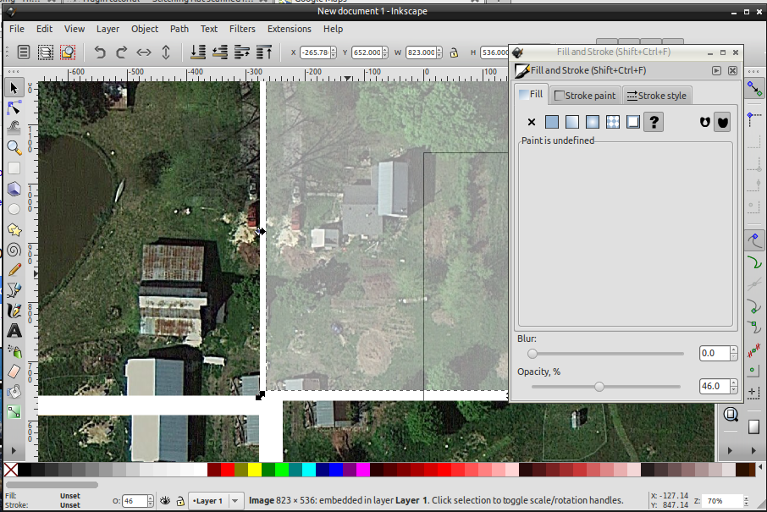
Here I'm setting the opacity of the picture on the right so that I can see
through it.
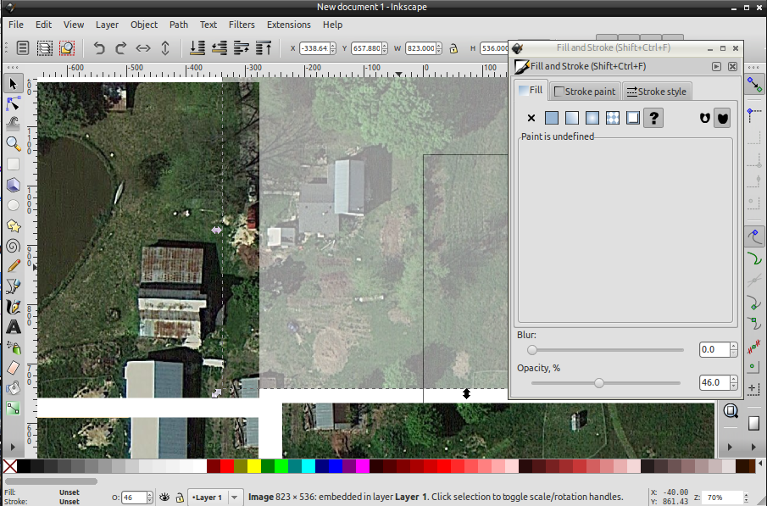
Here I'm overlaying the image onto the one to the left so that the features
line up. You can tell when you get it right on because the part with the
overlap will go from looking kind of blurry and indistinct to being very sharp
and clear. Also, it really helps to zoom way in on distinctive features in the
overlap zone here (in this case I used the red vehicle for alignment, but you
can use anything recognizable). It's a little hard to see, but if you look to
the left of the red vehicle you can see the dotted line that shows the boundary
of the transparent photo I'm overlaying. That should give you a sense of the
amount of overlap you want.
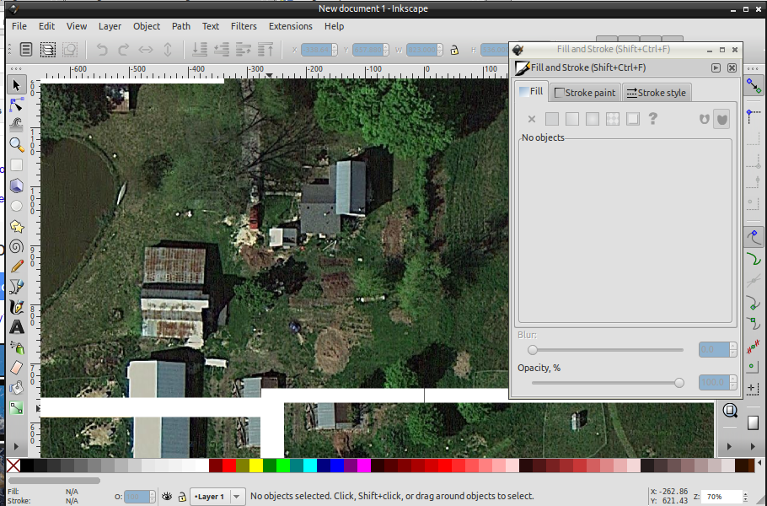
Here is the finished overlap between those two images. You can see how well the
seam is blended:
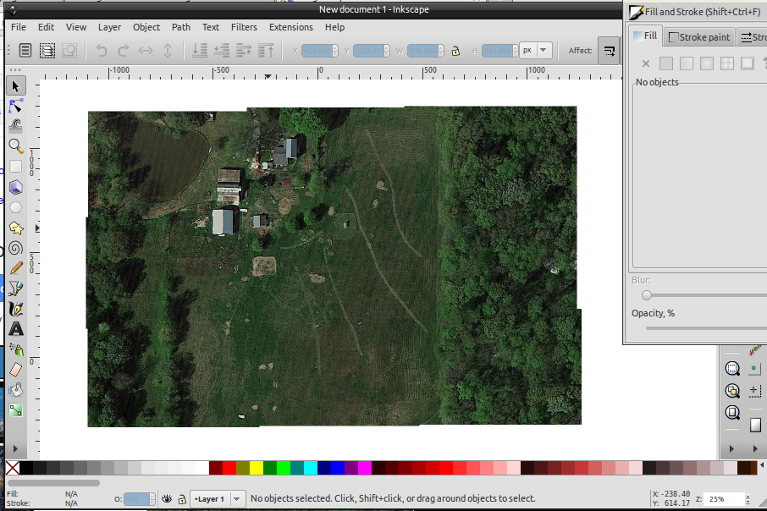
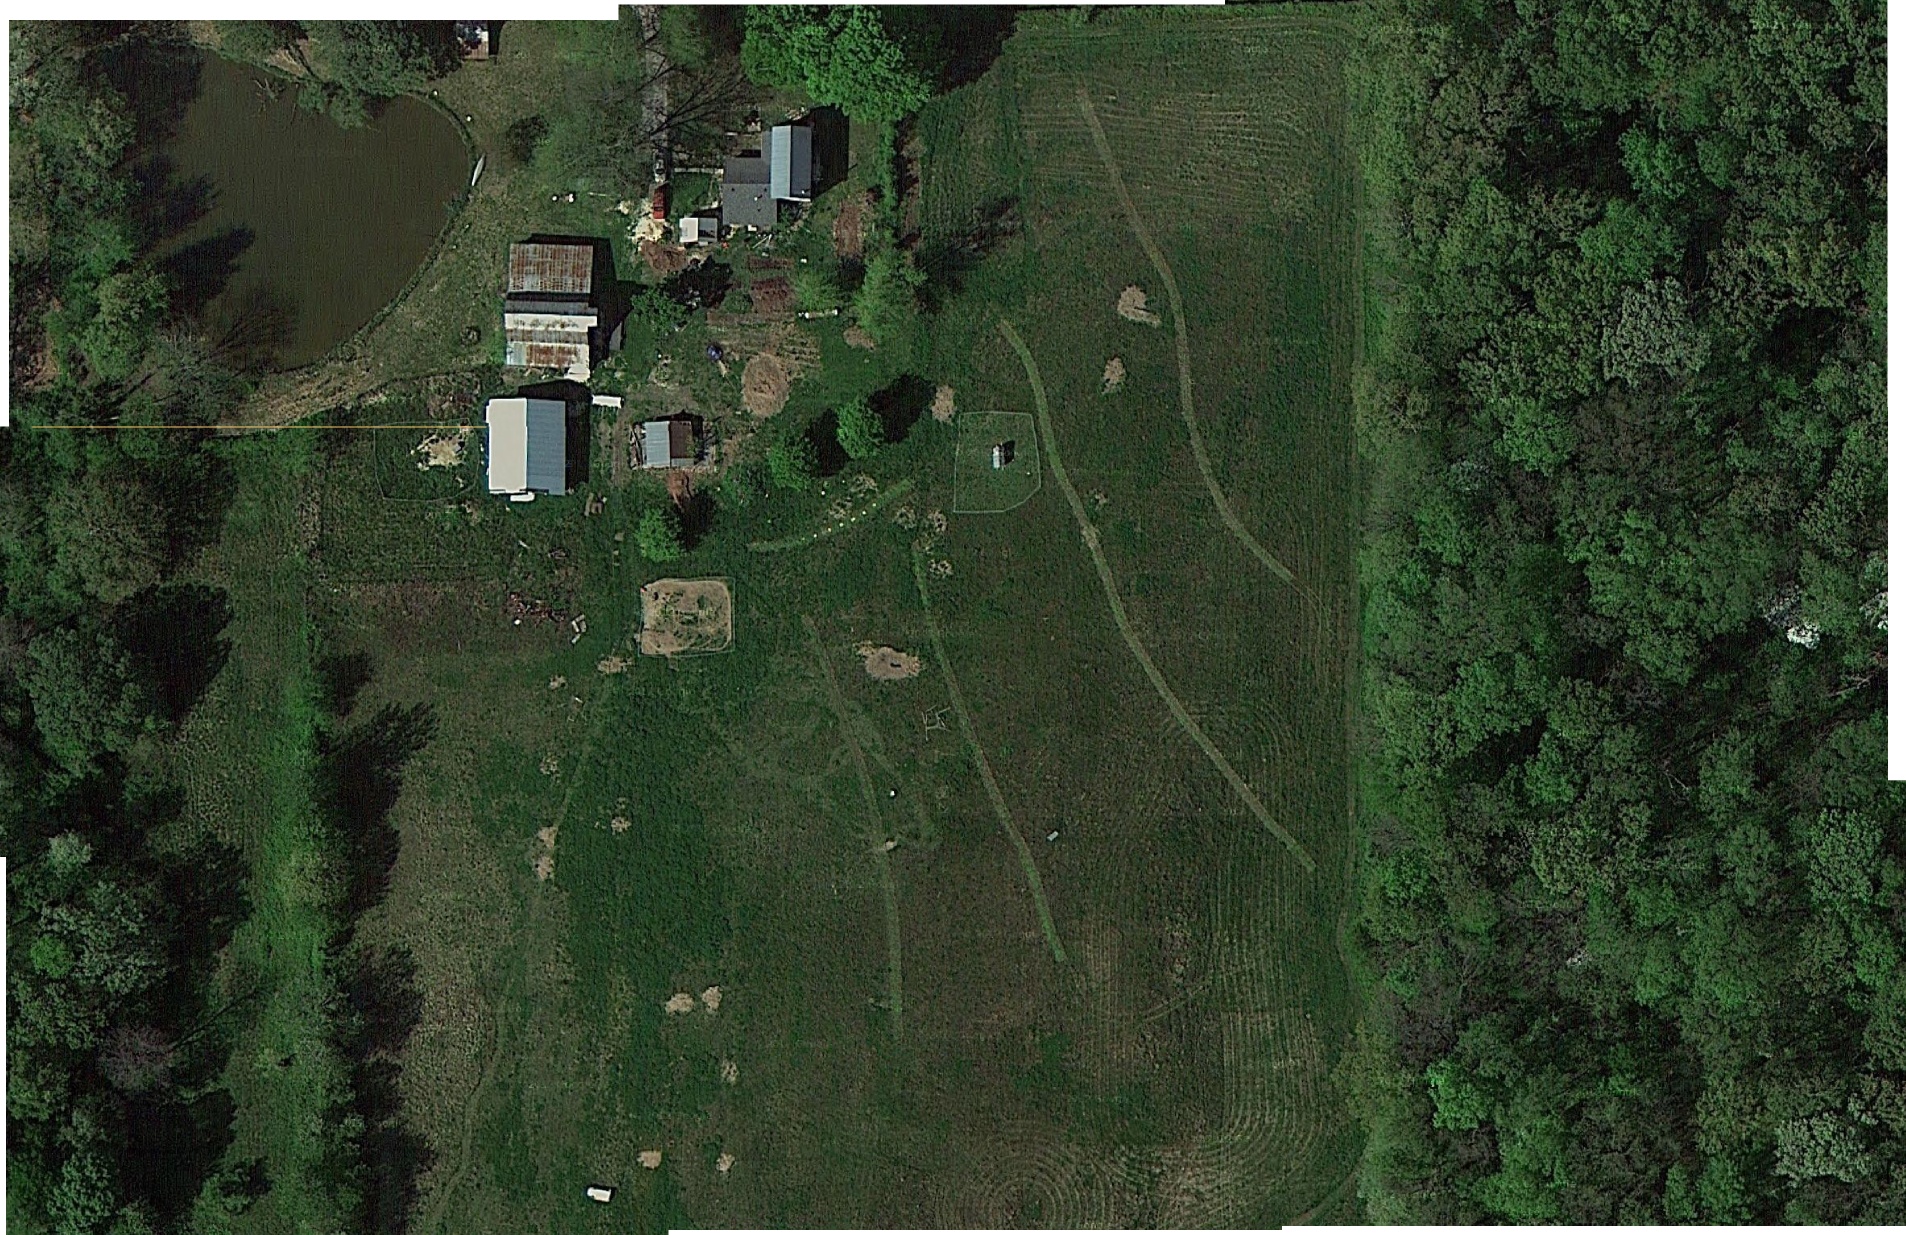
Here is the whole image after all of the parts have been aligned.
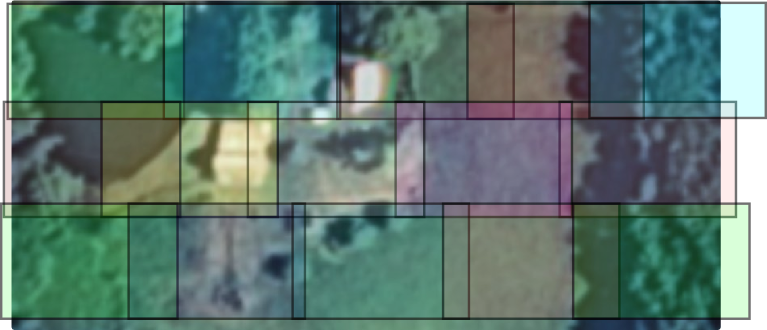
And here is an image where I'm showing the boundaries of all of the images just
so you can see where the overlaps are. Note that they're not perfectly arranged
in rows and columns, that's just a natural part of the process when you have to
drag the map around by hand.
If you want to download the full-resolution result of this, you can click here